Microsoft Outlook is a very useful email app for your business. It has the ability to create multiple groups and send emails directly to these groups. With this feature, you can send an email directly to a group of people, instead of sending each individual email individually.
Here’s how to create email group in Outlook so you can save time when sending out frequent mailers:
1. On your Outlook web app, click on the People icon on the navigation bar.
![]()
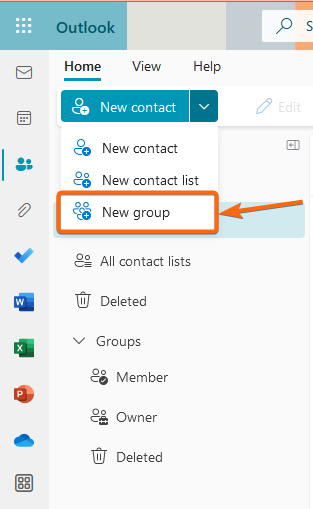
2. Click on the dropdown arrow and select New group.
3. On the popup window, type in the name of your group. For organisation emails, it will automatically create an email address (you can use this when sending out your next mailers – just type in one email address and the contact group will already be included!). You can also add in a description for the group, as you would prefer. Once done, click on Create.
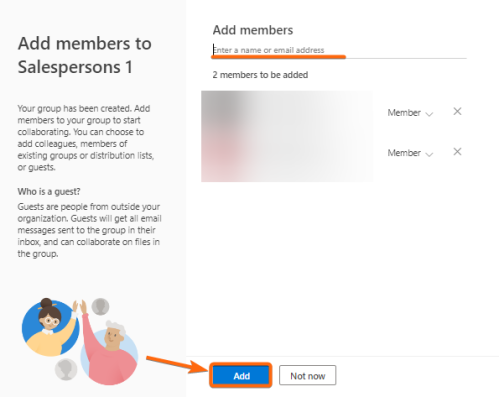
4. After you successfully create email group in Outlook, you can now add members. Type in their email address or their names and their organisation emails should pop-up. You can then select and they will show up on the list below. Once you’re done, click on Add.


