Being able to synchronize your email account across all your devices and workstations is one of the top priorities for a business. You want to make sure that wherever you are across the globe, whether you are on your computer or simply on your phone, you get access to your contacts and emails right away. Outlook helps you with that, with applications compatible to both your desktop and smartphone.
To add your IMAP email directly through Outlook, you can check how to do that here.
In this article, let us show you how to do it from the Control Panel, and through manual configuration:
- Launch Control Panel.
- On the search bar, type “Mail”. This is how your search result may look like:
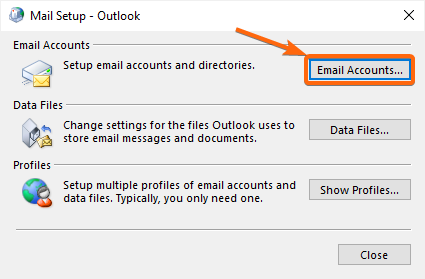
Click on Mail (Microsoft Outlook). - A new window should show up. Click on Email Accounts.
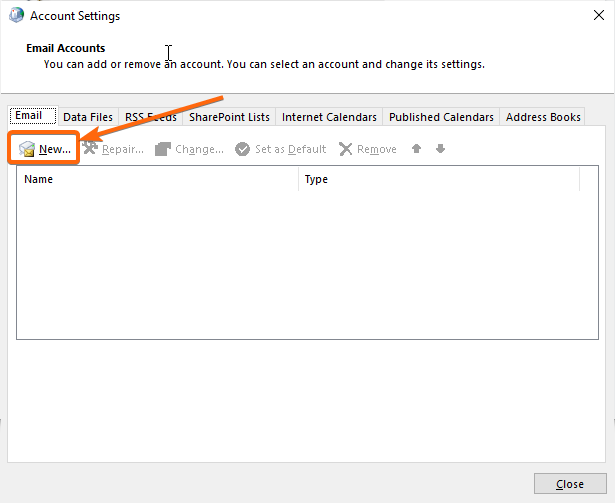
- The Account Settings window will now appear. Under the Email tab, click on New.
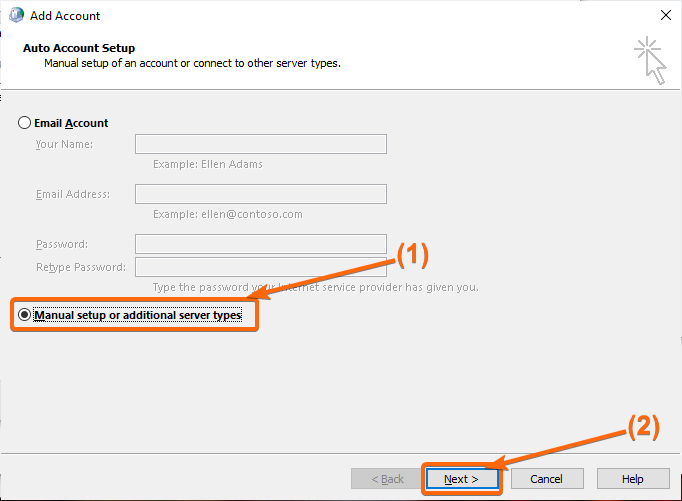
- In the Add Account window, choose Manual setup or additional server types, then click on Next.
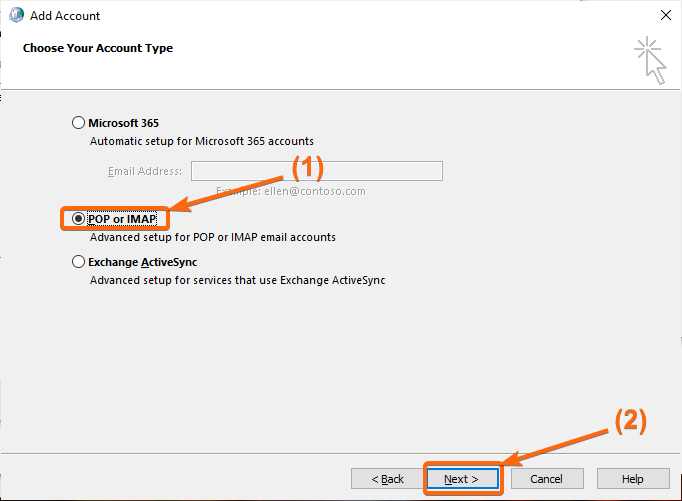
- Select POP or IMAP, and click Next again.
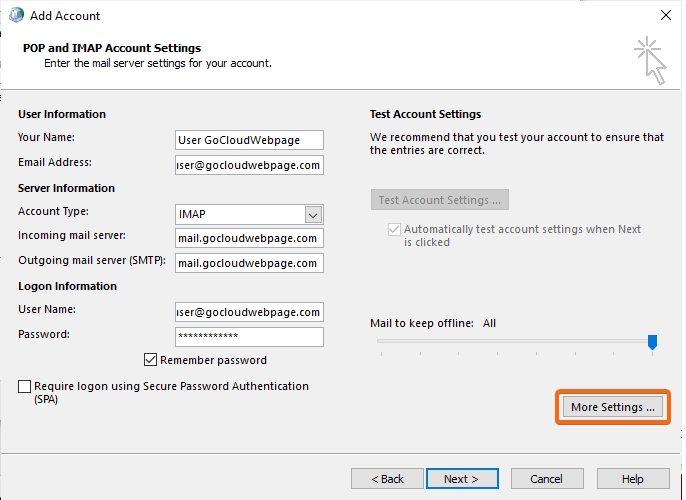
- You will be routed to the POP and IMAP Account Settings window. This window will require you to enter the following information:
User Information
Your Name: (your name you want to appear in your Outlook IMAP inbox)
Email Address: (your CLDY email)
Server Information
Account Type: IMAP (select from dropdown)
Incoming mail server: mail.gocloudwebpage.com (replace gocloudwebpage.com with your domain)
Outgoing mail server (SMTP): mail.gocloudwebpage.com (replace gocloudwebpage.com with your domain)
Logon Information
User Name: (your CLDY email)
Password: (your CLDY email password)
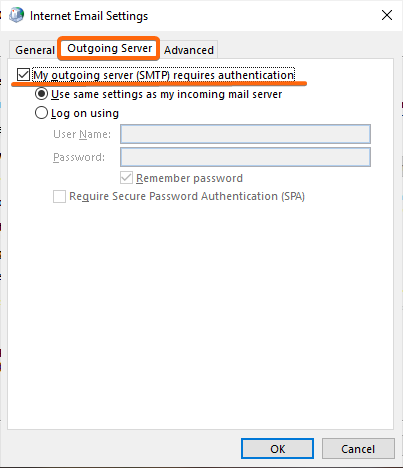
Once you have all the information filled up, click on More Settings. - You are now in the Internet Email Settings window. First, go to the Outgoing Server tab, and check the box My outgoing server (SMTP) requires authentication.
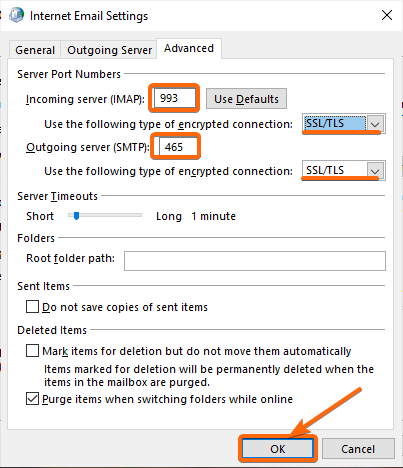
Then, go to the Advanced tab, and modify the following information:
Under Server Port Numbers:
Incoming server (IMAP): 993
Use the following type of encrypted connections: SSL/TLS
Outgoing server (SMTP): 465
Use the following type of encrypted connections: SSL/TLS
You can now click on OK.
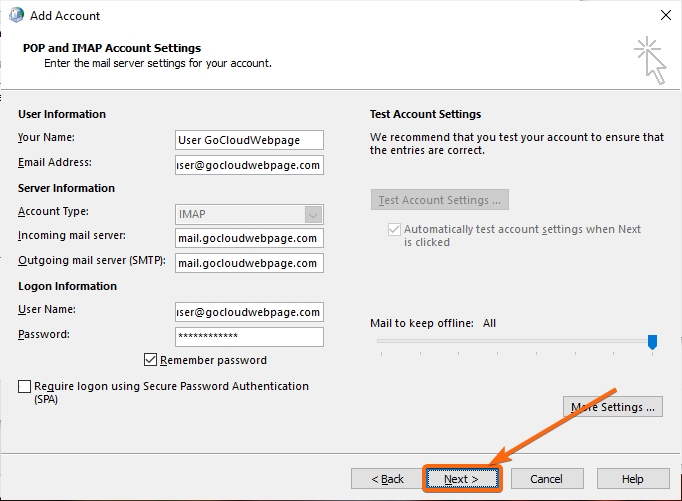
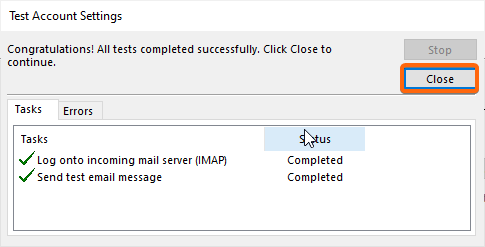
You will return to the POP and IMAP Account Settings page. From here, click on Next. - A Test Account Settings window will pop-up. Once all task statuses are marked completed, you can now click on Close.
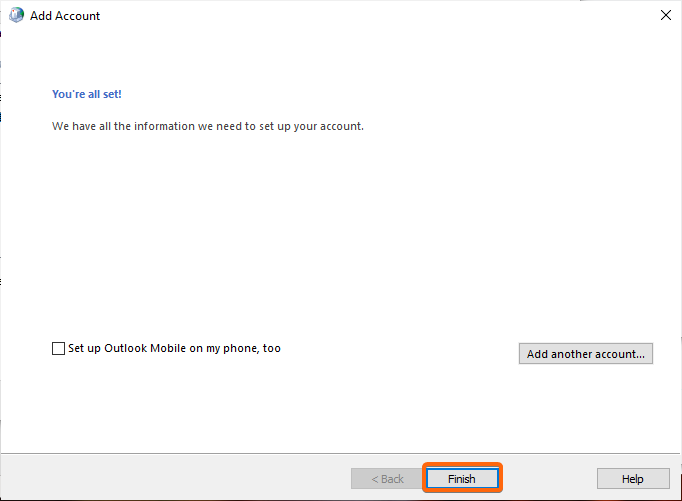
Click on Finish to complete your IMAP account setup.
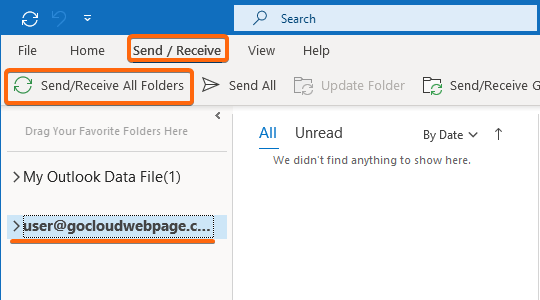
You can now try to access the Outlook application. The IMAP email should already reflect on your screen. Go to Send / Receive and click Send/Receive All Folders to synchronize your mailbox.
Tips: Support for CLDY Clients If you are a Web Hosting, Email Hosting or VPS subscriber, and you need help with the setup, contact us and we will remotely connect to your computer using Anydesk to remotely configure for you.


