When your Outlook inbox gets flooded with spam messages, it’s going to be annoying and distracting. Activating your Outlook spam filter can help keep your inbox cleaner, and even boost productivity.
Let us show you how you can make the most of your Outlook spam filter:
Outlook desktop
The Outlook app has an automatic Junk Email Filter which you can turn off, or set to different security levels. Here’s how you can do it:
- From Home, click on Delete group.
- Then go to Junk, and then Junk E-mail Options.
- Select the security level of which you want Outlook to protect your emails from.
- No Automatic Filtering: The automatic Junk Email Filter will be turned off. (If you have set blocked emails and domains separately, they will still apply.)
- Low: If you are not a frequent recipient of spam messages, you can turn the spam filter to Low. This setting will only remove the obvious spam emails you may receive.
- High: This is recommended for those who receive a lot of spam emails. You will still receive emails from your Safe senders and domain lists. (Please make sure to still check the Junk E-mail folder for any emails that are mistakenly tagged as spam.)
- Safe Lists Only. If you want to restrict your inbox solely for your Safe senders and domains, you can turn on this option. Any email from other addresses will automatically be tagged as spam and will be transferred to the Junk E-mail folder.
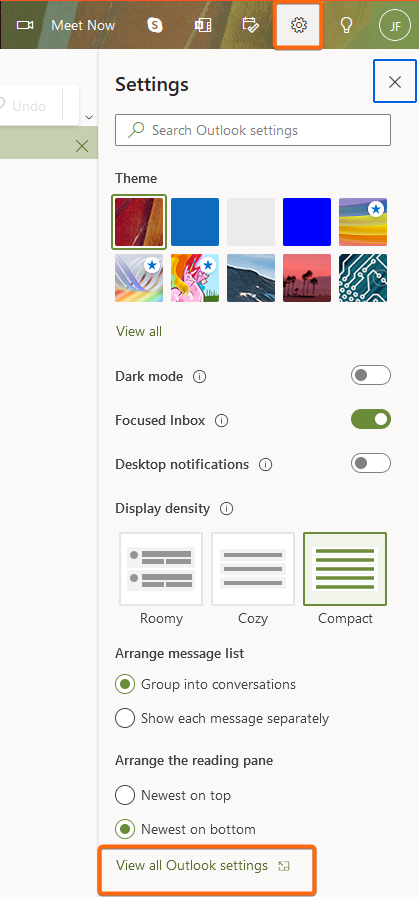
Outlook web app
- At the top right, click on the gear icon for Settings. Scroll to the bottom and click on View all Outlook settings.

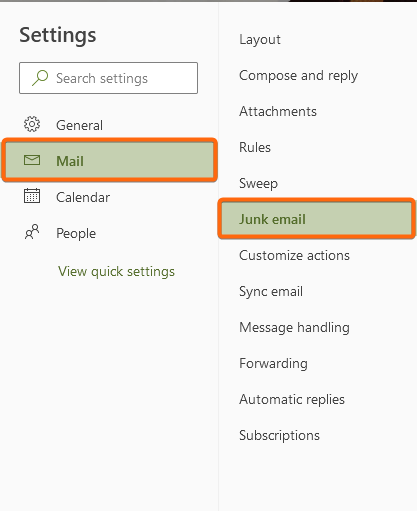
- On the popup window, click on Mail, then Junk email.

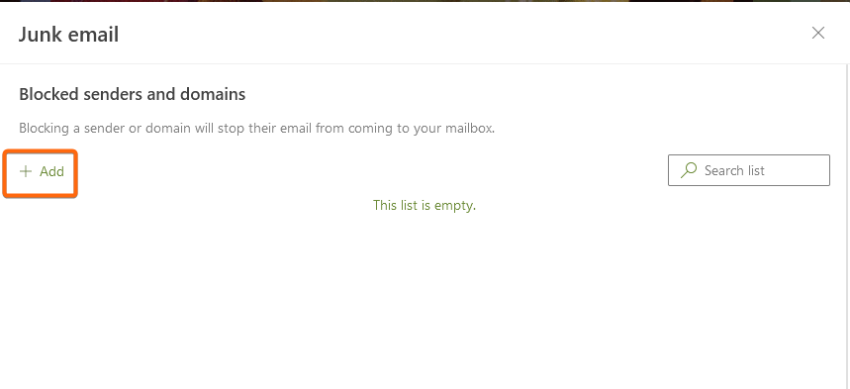
- On the next screen, you will see the spam filters for Outlook that you can customise. First is the Blocked senders and domains. If you have been receiving nuisance emails that are most likely spam or bot messages, you can add the email addresses here. Take note that these emails will automatically be tagged spam and will not be received in your mailbox.

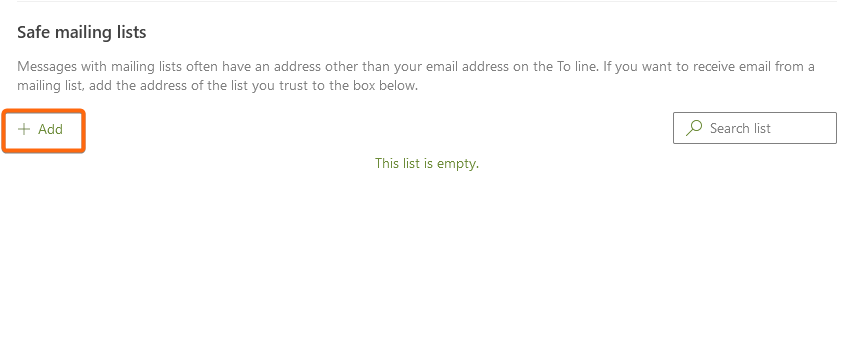
- Next section is the Safe mailing lists. These are contact groups or lists that you are a member of, or a contact group that you created, so that emails from these lists always appear straight in your main inbox.

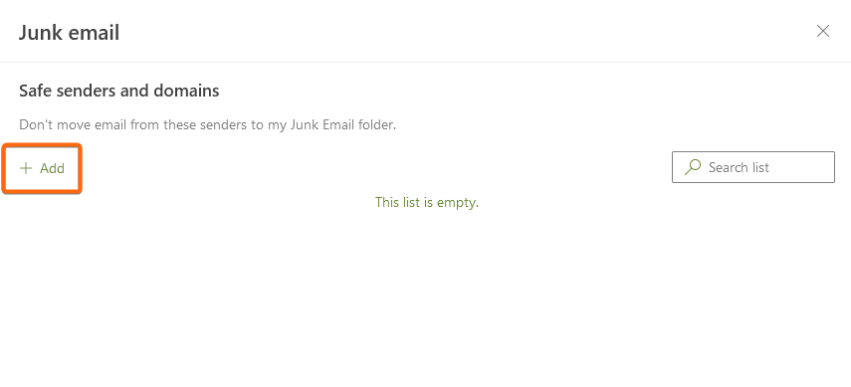
- In the Safe senders and domains, you can add the individual email addresses of those contacts that you want to make sure you receive emails from. It can be from your vendors, your clients, or even your family members – so you can always be on top of their messages or requests.

- Last is the spam filters, or Filters. Check the boxes that apply to your preferred junk email settings.