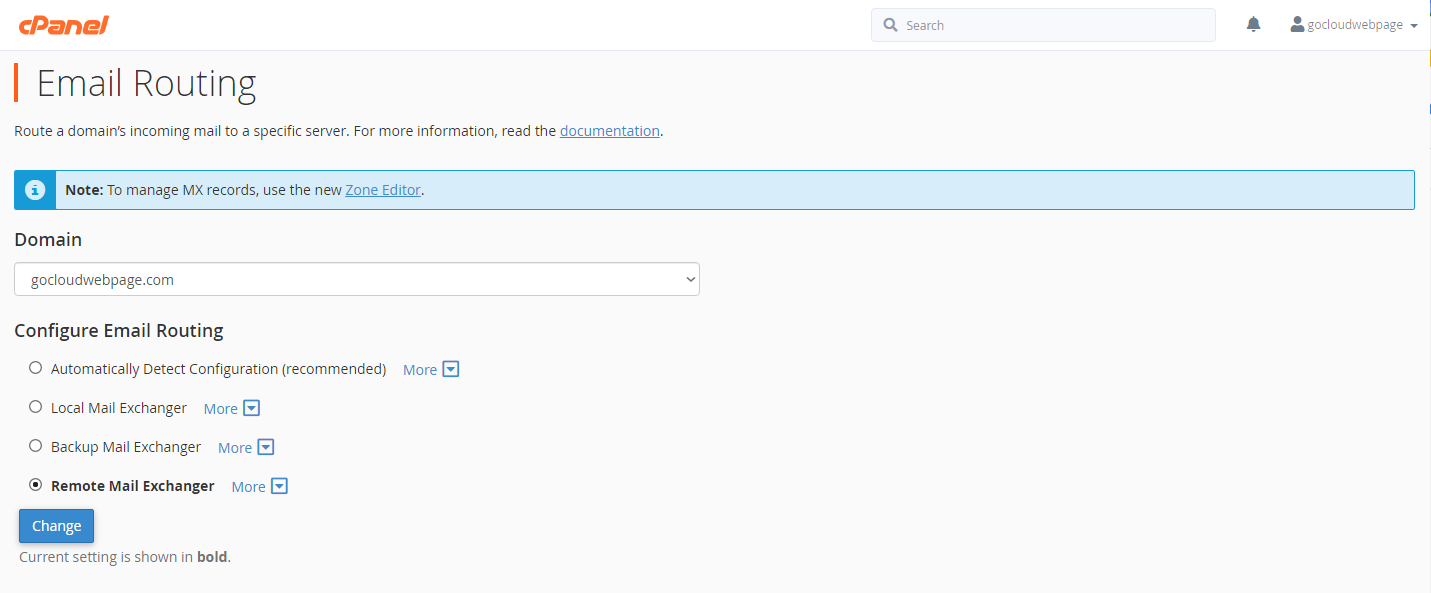
To route emails to a specific domain, login to cPanel and follow the steps below:
- On your cPanel homepage, scroll to Email, and click on Email Routing.

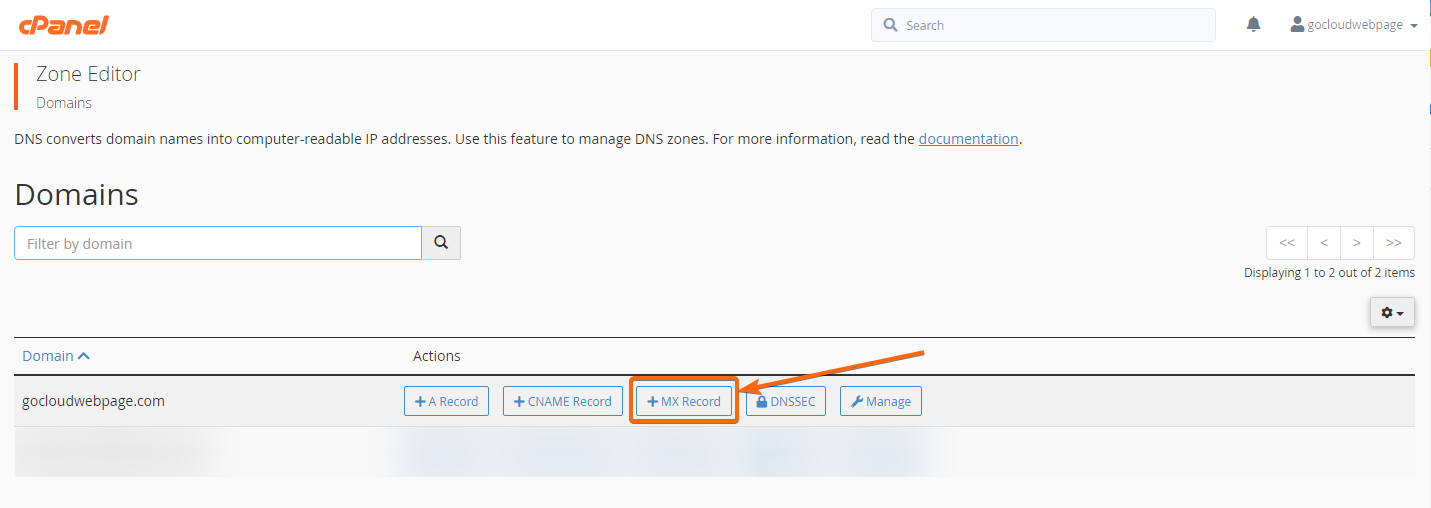
- Before selecting the domain, you will need to add an MX record. Click on Zone Editor.

The Zone Editor page will load. On the same row of the email domain you need rerouted, click on MX Record.
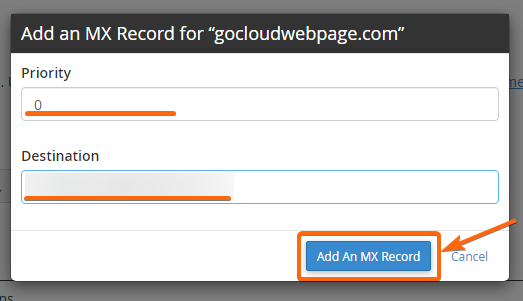
Indicate the Priority (the lower the number, the higher priority level), and the Destination domain. Once done, click on Add An MX Record.
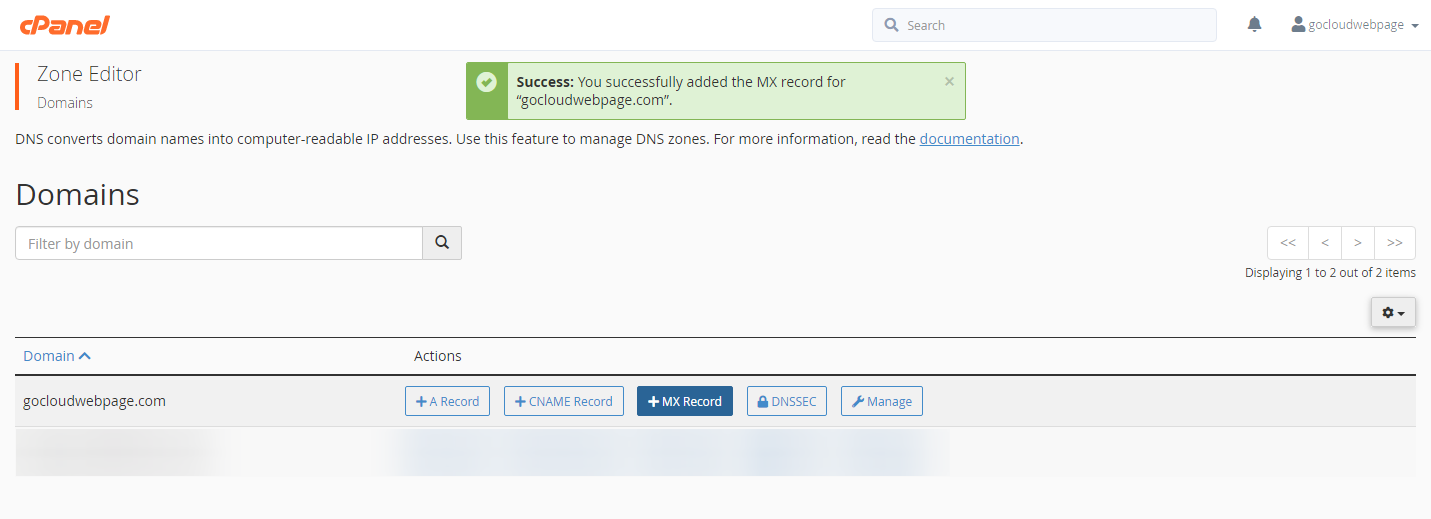
You will be given a successful prompt saying the MX record is now added to your selected domain. - Return to the Email Routing page, and select the domain you will be routing.
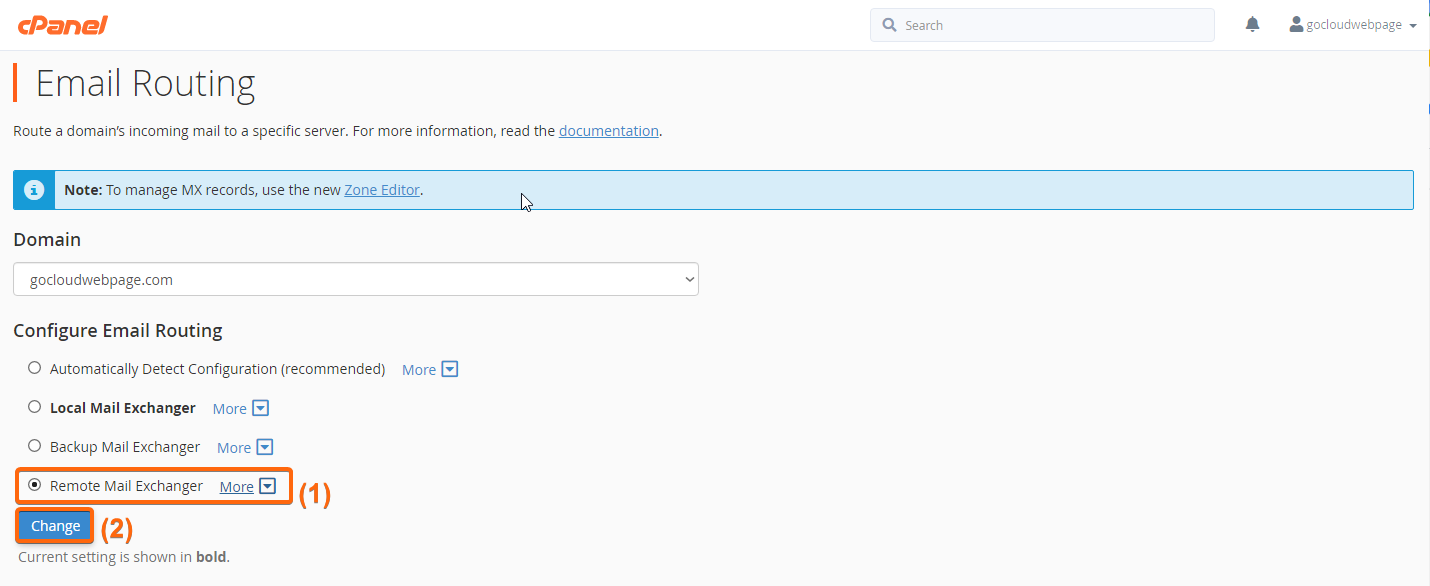
By default, your email routing is set to Local Mail Exchanger. Click on Remote Mail Exchanger, and then Change.
The screen will reload, and Remote Mail Exchanger will now be shown in bold, as the new current setting for email routing.
Note: When Remote Mail Exchanger is selected, your current domain will not be receiving any mails. All emails will then be routed to the domain you selected under the MX record.


